ویژگی های ماژول رادیو FM استریو TEA5767
ماژول TEA5767 یک گیرنده امواج رادیویی FM است که میتواند با استفاده از پروتکل I2C به میکروکنترلر وصل شود و به جستجوی ایستگاه های رادیویی بپردازد. این ماژول دارای خروجی هدفون است.
دیتاشیت ماژول رادیو FM استریو TEA5767 را می توانید از اینجا دانلود کنید.
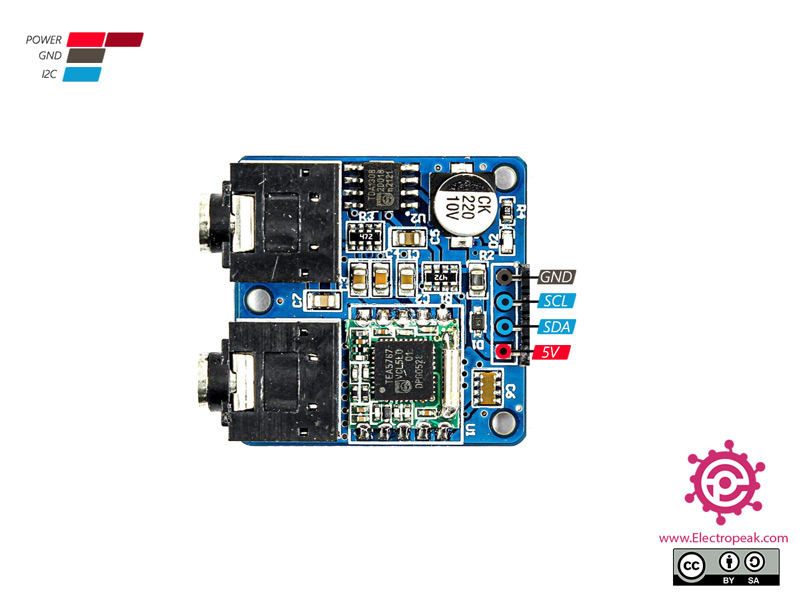
معرفی پایه ها (Pinout) ماژول رادیو FM استریو TEA5767
این ماژول دارای 4 پایه به شرح زیر است:
- VCC:تغذیه ماژول – 5 ولت
- GND:زمین
- SLC: همزمان سازی برای پروتکل I2C
- SDA: اطلاعات برای پروتکل I2C
پین اوت (Pinout) این ماژول را می توانید در تصویر زیر مشاهده کنید.
لوازمی که به آن احتیاج دارید

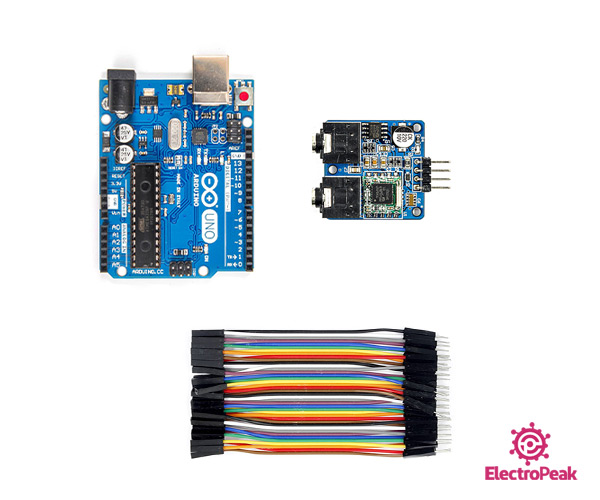
قطعات مورد نیاز
نرمافزارهای مورد نیاز
راه اندازی ماژول رادیو FM استریو TEA5767 با آردوینو
گام اول: سیم بندی
مطابق مدار زیر، ماژول را به آردوینو وصل کنید.
نکته
جهت دریافت سیگنال، یک آنتن یا هدفون را به فیش آنتن متصل کنید.
گام دوم: نصب کتابخانه
ابتدا کتابخانه زیر را روی آردوینو IDE نصب کنید.
مطالعه پیشنهادی
اگر نیاز به راهنمایی بیشتر برای نصب کتابخانه در آردوینو دارید، می توانید به آموزش نصب کتابخانه در آردوینو مراجعه کنید.
گام سوم: کد
کد زیر را روی برد آردوینو خود آپلود کنید.
/*
modified on Sep 7, 2020
by big12boy Examples from https://github.com/big12boy/TEA5767.git
Home
*/

#include <TEA5767.h>
TEA5767 radio = TEA5767();

//User changeable
short minlvl = 14; //Required Signal Level (0-5=unuseable, 6-9=poor, 10-12=good, 13-14=really good, 15=excellent)
long baud = 250000; //Baudrate of the Serial Interface
//---------------

void setup() {
  Serial.begin(baud); //Initialize Serial Connection

  radio.init(minlvl); //Initialize needed Features and search for Stations

  //Print the result
  Serial.print("Found ");
  Serial.print(radio.getStations()); //Get Number of Stations from Library
  Serial.println(" Station(s):");
  Serial.println();

  //Print all available Stations
  listStations();

  Serial.println("Send something to change to the next Station!");
}

void loop() {
  //Wait for User Input
  if(Serial.available()){
    radio.nextStation(); //Switch to next Station

    delay(50);    //Wait for the Signal to stabilize
    printStation(); //Print Station Details

    while(Serial.available())Serial.read(); //Clear the Serial Buffer
  }
}

void listStations(){
  short stations = radio.getStations(); //Get available Stations
  for(short i = 0; i < stations; i++){ //Go through all Stations
    delay(50);  //Wait for the Signal to stabilize
    printStation(); //Print Details
    radio.nextStation(); //Jump to the next Station
  }
  Serial.println("----------------------"); //Finish of the List
}

void printStation(){
  Serial.print("Frequency:   ");
  Serial.println(radio.getFrequency()); //Print current Frequency
  Serial.print("Signallevel: ");
  Serial.println(radio.getSignalLevel()); //Print current Signal Level (0-15)
  Serial.println();
}
پس از اجرای کد، باید تصویر زیر را در خروجی سریال مشاهده کنید.


