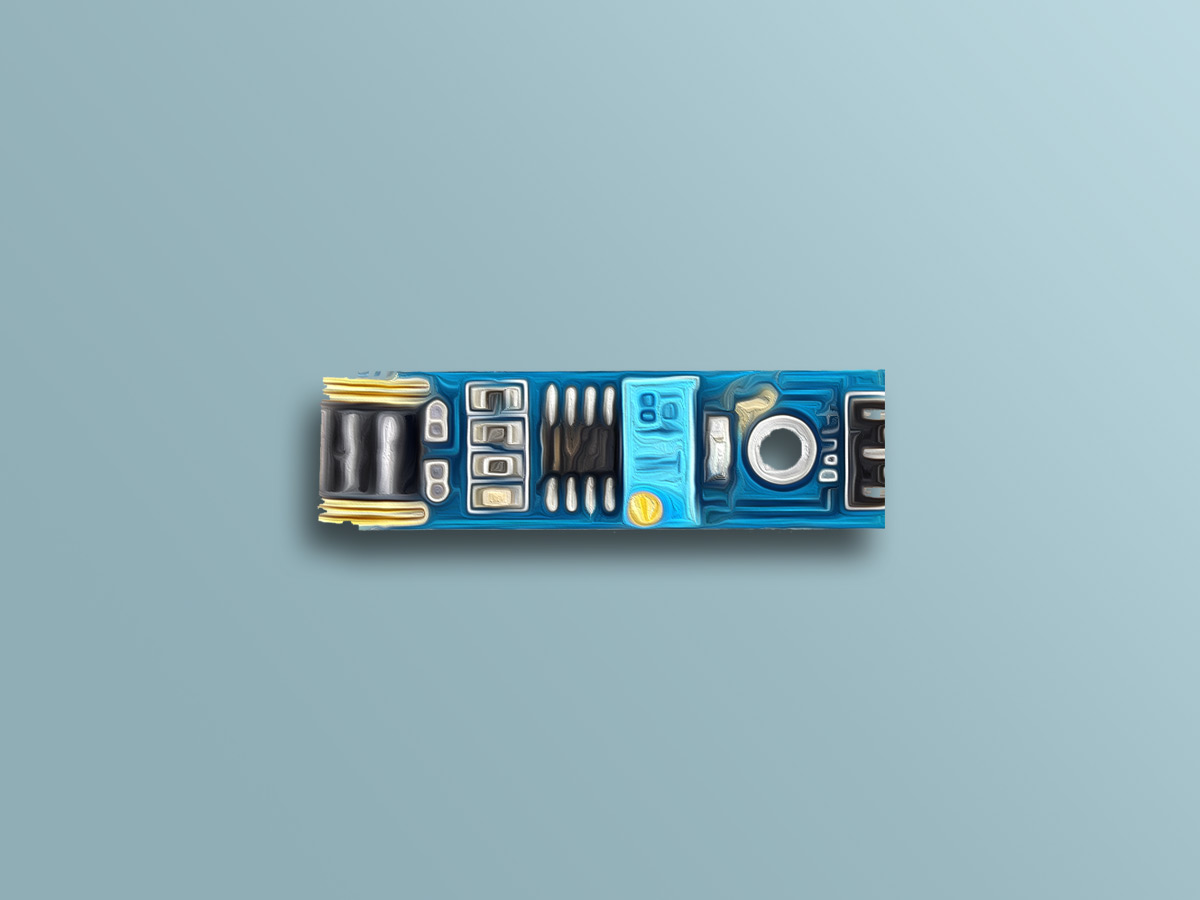
ماژول سنسور لرزشی 801S دارای یک پین خروجی دیجیتالی است که با تشخیص لرزش تا آستانه ی مشخصی، خروجی HIGH می دهد. حساسیت این سنسور را میتوان با پتانسیومتر روی ماژول تنظیم نمود. IC روی این ماژول LM358 می باشد. از این ماژول در سیستم های امنیتی میتوان استفاده کرد.
توجه
حساسیت این ماژول بسیار بالا می باشد.
جهت دریافت دیتاشیت ماژول سنسور لرزش 801S اینجا کلیک کنید.
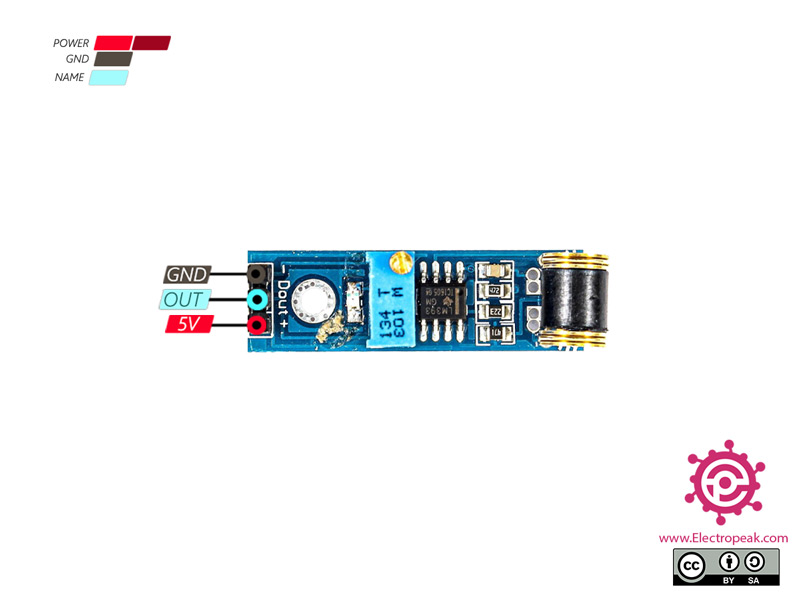
پین اوت (Pinout) این ماژول را می توانید در تصویر زیر مشاهده کنید.
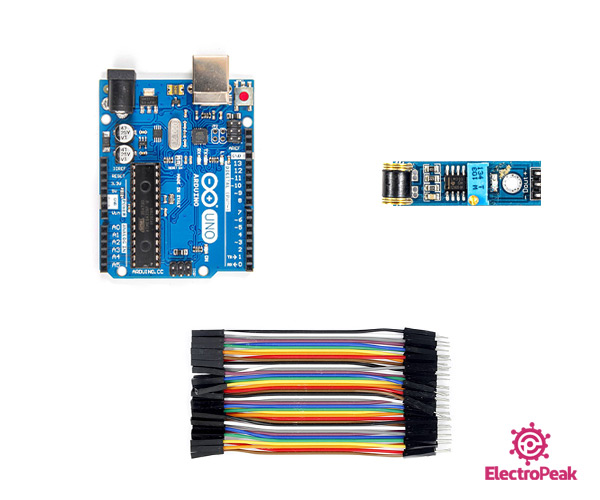
لوازمی که به آن احتیاج دارید
قطعات مورد نیاز
آردوینو UNO R3
×
1
ماژول سنسور لرزش 801S
×
1
سیم جامپر نری به مادگی
×
1
نرم افزارهای مورد نیاز
آردوینو IDE
راه اندازی ماژول سنسور لرزش 801S با آردوینو
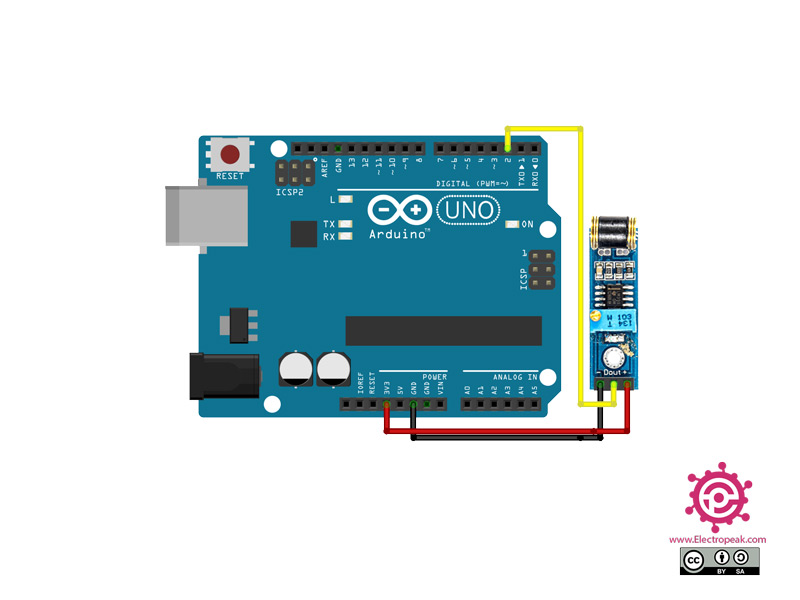
گام اول: سیم بندی
مطابق مدار زیر، ماژول را به آردوینو وصل کنید.
گام دوم: کد
کد زیر را روی برد آردوینوی خود آپلود کنید.
/*
  Button

  Turns on and off a light emitting diode(LED) connected to digital pin 13,
  when pressing a pushbutton attached to pin 2.

  The circuit:
  - LED attached from pin 13 to ground
  - pushbutton attached to pin 2 from +5V
  - 10K resistor attached to pin 2 from ground

  - Note: on most Arduinos there is already an LED on the board
    attached to pin 13.

  created 2005
  by DojoDave <http://www.0j0.org>
  modified 30 Aug 2011
  by Tom Igoe

  This example code is in the public domain.

  http://www.arduino.cc/en/Tutorial/Button
*/

// constants won't change. They're used here to set pin numbers:
const int buttonPin = 2;     // the number of the pushbutton pin
const int ledPin =  13;      // the number of the LED pin

// variables will change:
int buttonState = 0;         // variable for reading the pushbutton status

void setup() {
  // initialize the LED pin as an output:
  pinMode(ledPin, OUTPUT);
  // initialize the pushbutton pin as an input:
  pinMode(buttonPin, INPUT);
}

void loop() {
  // read the state of the pushbutton value:
  buttonState = digitalRead(buttonPin);

  // check if the pushbutton is pressed. If it is, the buttonState is HIGH:
  if (buttonState == HIGH) {
    // turn LED on:
    digitalWrite(ledPin, HIGH);
  } else {
    // turn LED off:
    digitalWrite(ledPin, LOW);
  }
void loop() {  Serial.println("0");}